

TOPIC 1: MANAGEMENT OF DATABASE INFORMATION SYSTEM – COMPUTER NOTES FORM FOUR
Updating Database
The Record in an Existing Database
Search a Record in an Existing Database
In this sub topic explains how to update existing data. Microsoft Office Access 2007 provides a number of tools for updating existing records, including datasheets, forms, queries, find-and-replace, and the new Data Collection feature. As you proceed, remember that updating data is not the same process as entering new data.
Use an update query to change existing data
- You use update queries to add, change, or delete part (but not all) of one or more existing records. You can think of update queries as a powerful form of the Find and Replace dialog box. You enter a select criterion (the rough equivalent of a search string) and an update criterion (the rough equivalent of a replacement string). Unlike the dialog box, update queries can accept multiple criteria, allow you to update a large number of records in one pass, and allow you to change records in more than one table.–Remember that you cannot use update queries to add entire records. To do that, you use an append query.
Note: The safest way to use an update query is to first create a select query that tests your selection criteria. For example, suppose that you want to update a series of Yes/No fields from No to Yes for a given customer. To do so, you add criteria to your select query until it returns all of the desired No records for that customer. When you are sure that you have the correct records, you then convert your select query to an update query, enter your update criteria, and then run the query to update the selected values. The steps in this section explain how to create a select query and then convert it to an update query.
Use Data Collection to update records
Office Access 2007 provides a new feature called Data Collection. You can set up a data entry form in Microsoft Office Outlook 2007, gather information, and store that data in an Access database.
- Use the Find and Replace dialog box to change data
- The Find and Replace dialog box provides another way to change small amounts of data in less time and with less effort.
Search for a record in Access database
- When you enter text in the Search box, the first matching value is highlighted in real time as you enter each character. You can use this feature to quickly search for a record with a matching value.You can also search for a specific record in a table or form by using the Find option.
This is an effective choice for locating a specific record when the record that you want to locate satisfies specific criteria, such as search terms, and comparison operators, such as “equals” or “contains”.
Note: You can only use the Find and Replace dialog box if the table or form currently displays data. This is true even if there are no visible records because a filter has been applied.
- Open the table or form, and then click the field that you want to search.
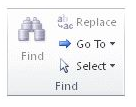
- On the Home tab, in the Find group, click Find.
- The Find and Replace dialog box appears, with the Find tab selected.
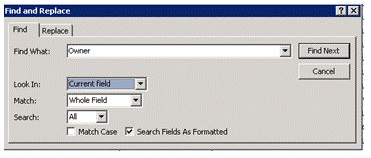
- In the Find What box, type the value for which you want to search.
- To change the field that you want to search or to search the entire underlying table, click the appropriate option in the Look In list.
- Tip: The Match list represents your comparison operator (such as “equals” or “contains”). To broaden your search, in the Match list, click Any Part of Field.
- In the Search list, select all, and then click Find Next.
- When the item for which you are searching is highlighted, click Cancel in the Find and Replace dialog box to close the dialog box. Records that match your conditions are highlighted
Queering Database
Query Database Using Logical Operators
Query Database Using Logical Operators
Queries are the fastest way to search information in a database. A query is a database feature that enables the user to display records as well as perform calculations on fields from one or multiple tables. You can analyze a table or tables by using:
- Select query
- An action query
Action query: These are queries that are used to make changes in many records at once. There are mostly used to delete, update, add a group of records from one table to another, or create a new table from another table Types of action query in Microsoft Access are:
- Update-update data in a table
- Append Query-add data in a table from one or more tables.
- Make table Query-Creates a new table from a dynaset
- Delete query-Delete specified records from one or more tables
Select Query Is a type of query used for searching and analyzing data in one or more tables. It lets the user specify the search criteria and the records that meet those criteria displayed in a dynaset or analyzed depending on the user requirement.
Creating a selected query
- Ensure that the database you want to create a query for is open
- Click the query tab, then new
- In the new query dialog box, choose either to create a query from in designing view or using Wizard
- To design from scratch, click design view. The show table dialog box appears from which you can add a table or tables you wish to create in a query form.
- Click the table from the query list and then click add
- Click close to close the show table dialog box.
- The query design grid opens. In Microsoft Access it is called query example (Q.BE)
Specifying the search criteria
- To search for a particular set of records, you have to enter a conditional statement or statements in the criteria.Example:If you have a table called employees with one of fields as salary, you can display all the employees earning more than shs.5000 by typing > 5000 in the criteria row, salary column.
- To define criteria, use either relational or logical operations, Relational operators include
- Less than <
- Greater than >
- Greater than or equal to >=
- Less than or equal to <=
- Not equal to <>
- Equal to =
- Logical operators include AND, OR and NOT
- AND is used to display values in a specific range.Example: if you type >4000 AND <6000 on criteria row in salary column. All employees who meet this condition will be displayed
- OR is used to display either one of the two values eg: if you wish to get those employees either in Dar es Salaam or Morogoro
- TO Display data in a particular range, use the word between eg in steady of typing >4000 AND >6000, type between 4000 AND 6000
- NOT is used to display all records except that you do not want to see.Eg if you type NOT 8000 in salary column of the employees table. All employees’ records will be displayed except those with the salary 8000.
Modifying and updating a query

To delete fields from the query grid.
- Open the desired query in design view
- Position the mouse pointer at the boundary that separates columns, then drag it to the required size. Alternatively, double click the boundary to auto fit cell content.
- Click the save button to save the changes
- To test whether the changes have been affected, click the run button to display the results of the query
Generating Reports
Report Layout by Using Design View Mode
Create Report Layout by Using Design View Mode
Report layout is designed by placing control on the report designer parts of a report. Report Header – This contain unbound controls that display title of the report Page Header- this contains heading or tables data items to be displayed in every column. Detail-Holds bound controls that display data items for the table or query it was created from Page footer-Holds the control that is to be displayed on every page such as the page number and data Report footer-Used to display summary from a report such as the grand total for numerical data in a particular field column.
Creating a Report in a Design View
- In a database windows, click the reports card then new
- In the new report dialog box, click design view
- Click the name of the table or query you want to generate a report from
- Click the OK button. You will get a report grid where you can place data controls.
- From the view menu, click Field list.
- To design the layout, drag each field from the field list to the layout grid and drop it where you want the data column to appear.
- Once you finish placing controls, click save button
- In the save as dialog box, enter the name of the report and click ok
- To view the report click the print preview button alternatively click print preview from the file menu
To modify header and footers
- Open the report in design view
- Click the report header or footer you want to modify
- Make the necessary changes and then click modify
- Click the print preview button to view changes
To add more controls on to the report layout
- Open a report in design view.
- Display the field list by clicking the field list button or using the view.
- Select one or more fields in the field list and drag view to the report design view grid.
To resize or move a control
- Click the control to select it. Position the mouse pointer on the place holder, until the mouse pointer changes to a double sided arrow.
- Drag the pointer to resize the control
- To move a control, select it and placed the mouse pointer on the place holder until it changes to a hand then drag.
Print a Report
Print a Report
Before printing, you should set the page options i.e. Margins paper size and orientation.
- Open the database that contains the report you want to print
- Click the reports tab, select the report you want to print, and then click the preview button
- On the file menu click print
- Set the printer options i.e. the printer type, print range and number of copies.
- Click ok to print.