

MAKING SIMPLE LEATHER JACKET PATTERNS – Leather Goods and Footwear
By the end of this element, you will be able to describe the meaning of leather jackets, identify tools and materials used in making simple leather jacket patterns, take measurements of leather jackets, and design simple leather jackets.
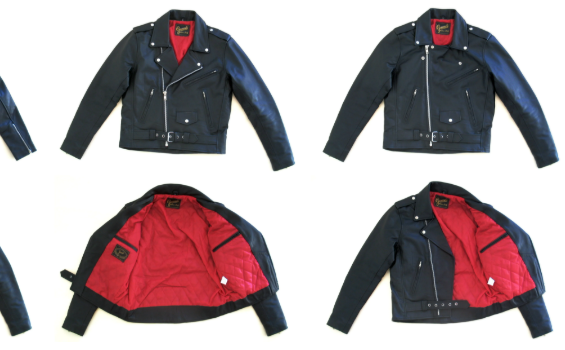
Meaning of leather jacket
The leather jacket is an outer garment made of leather extending either to the waist or the hips, with either long or short sleeves and fasteners.
The main features of leather jacket patterns are often made as shown in Figures below.

Jacket pattern

Front part and back part
Tools used for designing leather jacket patterns
Various tools are used for this purpose, including a tape measure, ruler, pencil, eraser, cutting board, tracing wheel, scissors, cutting knife, and French curve knife.
Materials used in making leather jacket patterns
The essential materials used in making leather jacket patterns are draft paper, soft manilla paper, and masking tape.
Procedures for making leather jacket patterns
After identifying the tools and equipment, perform the following procedures.
1. Identify the required design.
2. Take body measurements for leather jackets.
Steps of taking body measurements
Take measurements through the following steps
(a) Measure a chest or bust: Lift your arms to the side and have your friend wrap the measuring tape under your armpits. Lower it until the tape is wrapped around the widest part of your chest. For women, wrap the tape around your bust, or the fullest part of your chest, as shown in Figure below.

Chest measurement
Add at least 1 inch to your chest measurement if you are looking for a more casual jacket. Casual jackets tend to be more loose-fitting.
Make sure the tape is always held level as your measurements taken.
(b) Find the circumference of a natural waist: Pinpoint the natural crease of your waist by bending to one side. This crease will be higher than where you normally wear your pants, above your belly button, but typically just below your ribcage. Keep the tape measure parallel to the floor and measure around your torso, where this crease is formed, as shown in Figure below.

Waist measurement
(c) Measure jacket length: For length, measure down the front of your chest from the top of your shoulder. Measure the spot where you want the jacket to hit, such as the top of your thigh.
(d) Measure the width of the shoulders: Stand with a relaxed, natural posture. Stretch the tape measure horizontally across the back of your shoulders, measure the full width of the shoulders, and record it.
This measurement is important for the shoulder of your jacket to lie flat, and not to bunch up or sag down over your upper bicep, as shown in Figure below.

Shoulder measurement
If the shoulder of a jacket does not properly fit, you will often see wrinkles or lumps in the sleeves and upper areas of the jacket.
(e) Find your sleeve length: Place one of your hands on your hip so that your arm is straight. Have a friend run the tape measure starting from the bone at the base of your neck down to your wrist, as shown in Figure below.

Sleeve measurement
(f) Find the circumference of your hips: Start the tape measure at one hip, wrap it around the other one, and then connect it back to the one you started with. The tape measure should be wrapped around the widest part of the hips, around the buttocks, as shown in below.

Hip measurement
A nice-fitting formal jacket should go past the waist and fall just over the widest curve of a hips, so this is a good measurement to know.
NOTE: Some patterns are constant most of the time. For example, the collar is normally 2 inches in width; the pockets are between 4 inches in width and approximately 6 inches in length. For hems, always allow 2 to 4 inches according to the garment. Always remember that the measuring process is a very important part because it is the foundation of patterns.
3. Sketch the leather jacket pattern on the hard manila sheet, as shown in Figures below.

Front view of a jacket

Back view of the jacket
4. Perform cutting out of leather jacket patterns: Cut the lines on a pattern that indicates where you need to cut the materials. Collect the patterns as shown in Figure below., shows a sleeve pattern.

Sleeve pattern

Leather jacket patterns
5. Label patterns.
The jacket upper patterns include the following patterns: jacket front, jacket back, neck facing, sleeve, and collar.
6. Making lining patterns
Making front-part lining patterns
Trace the pattern on a manila paper. Use tracing paper or lightweight white paper to trace over a pattern piece. Take the facing pattern piece and line it up along the centre front, matching the neckline edges. Mark the facing seamline on a traced jacket front. Add seam allowances to the lining pattern piece – for a total of 1 1/4” added to the lining front piece.
Now, add 1/2” to the hemline. This allows for a pleat at the hem of the lining. Add 1/4” out from the side seam, and 5/8” up from the armhole point, as shown in Figure 1.43.

Front part lining pattern
Making back-part lining patterns
Making the lining for the jacket’s back part is the same method as the front; the only difference is adding a pleat to the centre back. We add this pleat for wearing ease and comfort – and also so the lining doesn’t rip when Tilly lifts her arms or hugs someone.
Trace off the back in the same manner as the front. Lay the back neck facing on the back and trace off the facing line. Add two seam allowances to the facing line for a total of 1 1/4” again. Add the 1/2” to the hemline and the same allowances around the armhole. The finished backlining pattern piece, outlined in red, is shown in Figure below.

Bark part lining pattern
Making sleeve pattern lining
Add a 1/2” below the hemline, and add the armhole allowances the same way you did onthe front and back lining pieces. The sleeve lining piece is shown in Figure 1.45.

Sleeve part lining pattern
Activity 1: Constructing a leather jacket lining pattern
Materials required: masking tape, manila paper, plain paper, and draft paper
Tools required: workbench, work table, tape measure, rulers, French curve, pencils, cutting board, tracing wheel and scissors
Procedures
1. Prepare the tools, equipment, and materials as mentioned above.
2. Prepare the working area.
3. Use the upper patterns to draw the lining patterns.
4. Cut all the lining pieces from the upper patterns or master patterns.
5. Label all the patterns.
Activity 2: Make a leather jacket pattern with two bottom front pockets.
Questions
1. Mention the challenges encountered while performing the task.
2. What measures did you take to overcome the challenges?
Exercise
1. What are the differences between leather jacket upper patterns and lining patterns?
2. Differentiate leather jackets from synthetic jackets.