MAKING MILITARY BOOT PATTERNS – Leather Goods and Footwear
By the end of this element, you will be able to define the military boot, identify tools, equipment, and materials used in making military boot patterns, and construct patterns of military boots, as shown in Figure below.

Military boot
Meaning of military boot
Military boots are tactical boots that extend the ankle upward and are worn by soldiers during combat training, parades, and other military activities.
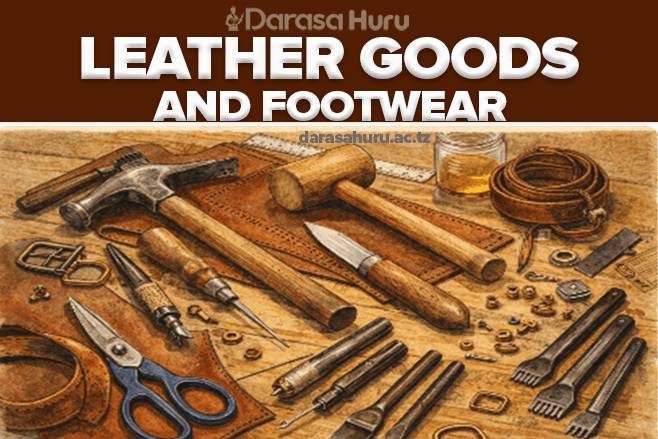
Tools, equipment and Materials for making military boot patterns
Tools: shoe last, cutting knife, pencil, flexible measuring tape, set of punches, awl, scissors, cutting board, marking pen
Equipment: computer,plotter, workbench
Materials: hard manila, soft manila, masking tape
Procedures for making military boot patterns
1. Prepare a shoe last as shown in Figure below.

Boot last
2. Cover a shoe last with masking tape, as shown in Figure below.

Boot last
3. Draw three basic lines: the centreline (main axis), the ball girth line, and the vamp line. To achieve this task, first, remove the masking tape, and attach them to a manila sheet. Second, make a mean formed by joining the outer and inner parts, as shown in Figure below.. Although these initial procedures of military boot pattern preparation correspond to preparation for Derby shoe patterns, the final ones differ as the military boot involves extending the ankle as the heel height is not much considered.

Mean forme with three basic lines
4. Fold your paper and mark the midpoint of the heel height and the line made by the fold. Notice the notches, as they will help to show the points when transferred to the manila paper Mark where the paper folds (at the front of the last), as shown in Figure below.

Mean forme with three basic lines
5. Cut along the lines to make marks, as shown in Figure below. This makes the process easier when transferring the actual pattern base, just as done in the Derby shoe pattern.

Mean forme with three basic lines
6. Transfer the pattern to another piece of paper or manila. Draw a 90-degree line, as shown in Figure below.

Construction of lines
7. The height of a boot is a choice of a customer, purpose or designer. However a popular military boot is around 25 to 28 cm in height. Draw a perpendicular line across the boot. Mark along that horizontal line how wide you want the boots to be. A good width is between 10–15 cm.
8. Make a vertical line upward from the back edge of the shoe last. This will be a top line of the boot. The length of this line depends on the shoe design preferred. As shown in Figure 1.130, the top line referred to is the vertical line drawn with a black colour. At the tip of a top line, draw a horizontal line towards the thimble of shoe last with an angle between 900 and 1050. The distance of this line depends on the thimble of the shoe last.

Construction of quarter pattern
9. Draw a line from the apex of the horizontal line drawn as directed in procedure number 8 towards the instep curve. Then, join that line to vamp by making a good curve, as shown in Figure below.

Extension of lines in a boot pattern
10. At this stage, add the lasting allowance (2.3–2.5 cm), and a small space to account for the heel counter (2–3 mm). Mark the heel counter at this stage as per design, as shown in Figure below.

Standard Pattern with lasting allowance
11. Make some lacing holes and a back strap, and mark where the lining will be, as shown in Figure below.

Lacing holes and a back strap
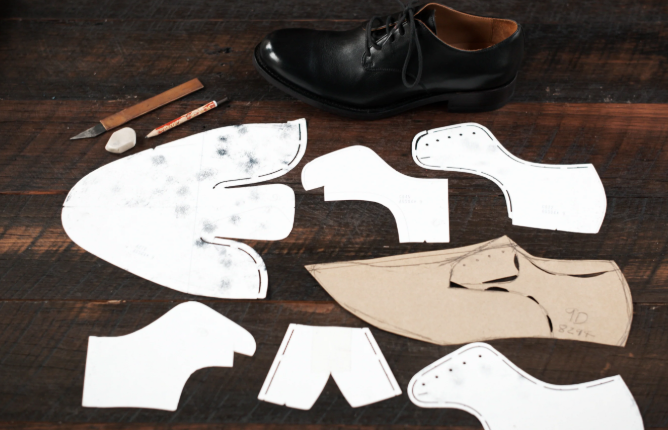
12. Cut the patterns straight along the lines, and wavy around the edges. Punch out and measure the lacing holes to the exact size they are going to end up being, as shown in Figure below.

Standard pattern
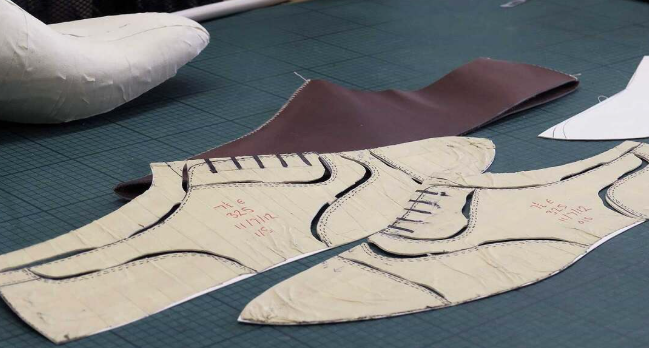
13. At this stage, construct quarter and quarter lining patterns. Place the standard pattern on a sheet of manila paper. Hold it firmly to avoid shape distortion. Mark the style lines of the quarter and all the integrated marks such as joint lines, eyelet tabs, and seamlines. Cut along the outline to obtain the pattern, as shown in Figures below. For the quarter lining, add 3–5 mm around the outlines for trimming after stitching.

Quarter pattern

Quarter-lining pattern
14. Copping the heel counter. Take a piece of manila paper and fold it in half. The centre of the folded manila paper will be a centreline. Next, position a quarter pattern on the folded manila paper and align it properly.
Adjust the heel counter along the centreline, Maintain the measurements and the appearance of the heel counter. Copy a heel counter along its lines, as shown in Figure below. Once marked, proceed to cut the heel counter.

Making heel counter
15. Prepare vamp and cap patterns by using the same procedures as in Derby shoe pattern making. For the vamp lining, add 5 mm as a trim allowance. The patterns will look as shown in Figure below.

Vamp, Cap, and counter strap
16. Making tongue pattern.When making the tongue measure the width of the vamp pattern which will be the tongue width. The length of the tongue should be the length of a quarter, as shown in Figures below.

Tongue making

Tongue making
Cut out a tongue pattern, as shown in Figure below.

Pattern of the military boot tongue
Confirm the length of the tongue in relation to the length of the quarter pattern, as shown in Figure below.

Confirm of tongue pattern
Mark the tongue pattern at the point where it will be attached to the vamp, as shown in Figure below.

Tongue pattern
After designing military boot patterns, parts of the military boot will look like it is shown in Figure below.

A sketch of military boot upper patterns
Activity 1: Using the standard pattern to make the tongue pattern of the military boot
Materials: hard manila paper, soft manila paper, masking tape, and draft paper
Tools: standard pattern, awl, pencil, flexible measuring tape, eraser, cutting board, and cutting knife.
Procedures
1. Prepare the tools and working table.
2. Fold a pattern paper at a length that can accommodate the centreline of the vamp.
3. Trace and make the tongue pattern.
4. Label the pattern with the pattern descriptions.
5. Clean and store the tools.
Questions
What challenges have you faced in making military boot patterns?
Exercise
1. How do military boot patterns differ from patterns of other shoes?
2. What are the features of military boots?