MAKING OXFORD SHOE PATTERNS – Leather Goods and Footwear
By the end of this element, you will be able to explain the meaning and features of Oxford shoes, identify tools, equipment, and materials used in making Oxford shoe patterns, and make patterns of Oxford shoes.
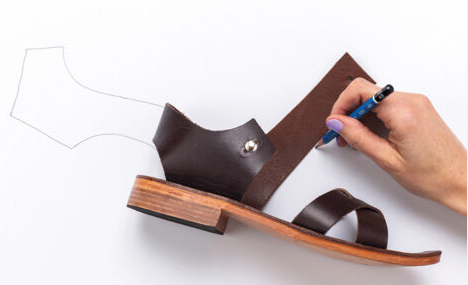
Meaning and features of Oxford shoes
Oxford is a type of shoe characterised by shoelace eyelet tabs on the quarters that are stitched underneath the vamp. The basic patterns for Oxford shoes are quarter, vamp, counter or backstrap, quarter lining, vamp lining, and insole patterns.
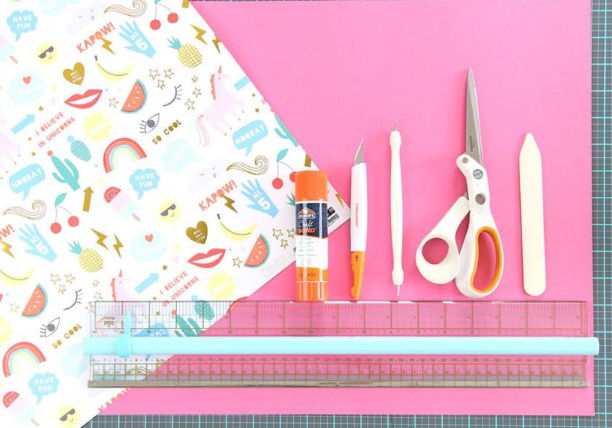
Tools, Equipment and Materials for making Oxford shoe pattern
Tools: shoe last, hand knife, pencil, eraser, awl, hole punch, flexible measuring tape
Equipment: computer, plotter, grading machine
Materials: masking tape, pattern paper
Procedures for making patterns of Oxford Shoes
1. Shoe last selection
A shoe last is a wooden, plastic, or iron model that represents the shape and measurements of the human foot. It is used in the process of assembly and manufacturing of shoes. It is crucial in the process of making shoes because it dictates the precise form, measurements, and adaptation properties of the footwear designed and manufactured on it.
Thus, the designer should select the shoe last based on the required shoe design. When making patterns for the Oxford shoes, select the shoe last with a suitable profile that matches its three surfaces, as shown in Figure below.

Surfaces of the shoe last
2. Covering the shoe last
Peel off the masking tape from its roll and stick it on the shoe last covering its outside and inside surfaces. Stretch the masking tape to reduce creases and wrinkles that may affect the movement of the pencil lead while drawing the style lines on the last shell, as shown in Figure below.

Peeling off of masking tape
At some of the more curved areas, the masking tape is slightly sliced to allow it to properly conform to the shoe last surface, as shown in Figure below.

Masking tape sliced for easy stacking
Alternatively, the shoe last can be covered halfway, where only one side is covered – the outside. Cover the gaps that remained during slicing with a knife. Therefore, they must be covered using a piece of masking tape to ensure the entire surface is well covered, as shown in Figure below.

Covering sliced part of shoe last
The smooth surface of masking tape is very essential. If there are wrinkles, you can reduce them by squeezing them using a pencil, pen or smooth rod. However, wrinkles may not be eliminated completely but must be reduced as much as possible. The best result after correctly taping and covering the shoe last is shown in Figure below.

The shoe last covered.
3. Drawing the centre and back curve lines
Mark the front and back centreline as shown in Figures below.. The centreline divides the shoe last into two halves. Start by marking with dotted lines, then connect the dots.

Marking the front centreline

Marking the back centreline.
4. Drawing a centreline
Draw the centreline, use a flexible straight-edged tape that is aligned to join the dotted front centreline. With the flexible tape following a curve of the shoe last, use a pencil to draw a smooth line connecting the dots, as shown in Figure below.

Drawing the front centreline
Draw the back centreline. Use a flexible tape to connect the dots of the back curve the same way as that of the front centreline, as shown in Figure below.

Drawing back centreline
5. Cutting from the front and back centreline
Use a hand knife, cut the masking tape on a shoe last through the centreline from top to toe point, as shown in Figure 1.55. Then, do the same to the back centreline, as shown in Figure below.

Cutting the front centreline

Cutting the back centreline
6. Cut along the feather edge
Trimming the excess masking tape along the feather line of the last is done using a triangular file, as shown in Figure below.. This activity can also be performed using a cutting knife and sometimes by using sandpaper.

Cutting the feather edge
7. Drawing basic construction lines
These are the ball girth line (GF) also known as the vamp line, the instep girth (JI) and the top line (FH), as shown in Figure 1.58. The instep girth and ball girth must be extended to the feather line.

Three basic construction lines
8. Drawing style lines
Draw the Oxford shoe style lines. Measure the standard last length (SLL) from the longest point of the toe to the heel. The ball girth line (G → F → outside ballpoint) is measured with a flexible measuring tape around the ball points of the shoe last.
The instep girth/instep line (J → I) is measured with a flexible measuring tape over the instep of the last. The top line (F → H) is measured with a flexible measuring tape from the mid-point of outside ball girth (G) to the back height point (H), then it will appear as shown in Figure below.

Oxford shoe-style lines on the last
9. Flattening
Peel off the shoe’s last shell and flatten it on the pattern paper to continue with pattern construction, as shown in Figure below.

Flattened oxford shell
Add the lasting allowance points to make a lasting margin, as shown in Figure 1.61. After adding the lasting margin, the pattern obtained is now called the standard pattern.

Standard pattern with lasting allowance in millimetres.
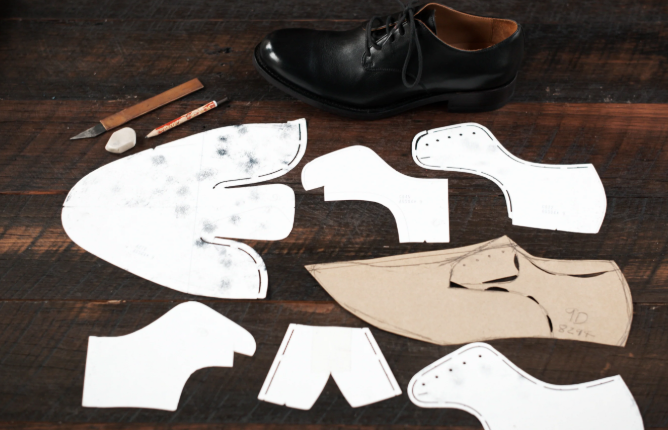
10. Constructing the basic patterns from the standard pattern
A complete shoe upper is made up of the upper and lining components that are stitched together in the construction process. Upper components are those external parts of the shoe, while the lining components are those parts inside the shoe that touch the wearer’s socks or feet. They can be developed as described below;
The working pattern pieces of the upper are as follows: the cape, vamp, counter and tongue, facing, and a quarter.
Toe cap: align the toe cap centreline of the standard pattern with the folded edge of the pattern paper, as illustrated in Figure below.

Aligning the toe cap centreline on the folded line of pattern paper
Copy style lines of the toe cup as shown in Figure below.

The copied contour lines of a toe cape.
Cut the traced toe cap through both layers of the folded pattern paper. Unfold the cut toe cap, cut the inside marker, and the centre marker, as shown in Figure below, and label the pattern with the pattern descriptions.

Toe cap with centre marker and instep marker
Vamp pattern: Align the standard pattern (with its vamp centreline). Aligned on the folded pattern paper to copy the vamp contours, as shown in Figure below.. Then, cut the contours through both layers and add allowances, as shown in Figures below.. Then cut the inside marker.

Vamp centreline aligned on the folded pattern paper
Add underlay allowance → 8mm, as shown in Figure below.

Folded vamp with underlay allowance
Unfold and cut the inside marker, as shown in Figure below.

Vamp pattern with allowances and markers.
Counter pattern: Align the standard pattern back curve with its points aligned along the folded edge of the pattern paper, as shown in Figure below..

The back curve of the standard pattern aligned with the folded pattern paper
Copy the contour lines of the counter pattern, as shown in Figure below.

The counter contours on the folded pattern paper
Add 3 mm for stitching or seam allowance, and add 5 mm folding allowance, as shown in Figure below.

Adding seam allowance 3mm and 5mm folding allowance
Cut the counter contour through both layers of the folded pattern paper. Unfold the counter pattern, as shown in Figure below., and label the pattern with the pattern descriptions.

The unfolded counter pattern.
Tongue pattern: Use the standard pattern to align the tongue centreline along the folded edge of the pattern paper, as shown in Figure below.
Note: Remember to mark point “M”, this is the point for tongue underlay. Hence there is no need to add an underlay allowance since it is already available from the standard pattern.

Tongue pattern contour aligned on the folded pattern paper
Cut the tongue contour through both layers of the folded pattern paper. Cut the reinforcement and unfold the tongue pattern, as shown in Figure 1.73. Then, label the pattern with the pattern descriptions.

The unfolded pattern of the tongue
Facing pattern: Copy the contour lines and lace holes of the facing by laying the standard pattern on a single layer of pattern paper. Add 4 mm or 5 mm folding allowance and 8 mm underlay allowance, as shown in Figure below. Then, bore the lace holes, also known as eyelet holes.
The formula for finding lace hole intervals
|
Length/(number of holes remained+1) |

The facing pattern.
Copy the contour lines of the quarter piece as shown in Figure below.

The quarter contours
Add 8 mm underlay allowance at the part of the quarter pattern that goes underneath the counter, vamp, and facing, and 4 mm folding allowance, as shown in Figure below.. Cut through the contour, and label the quarter pattern with the pattern descriptions.

Adding allowances on the quarter pattern.
This step completes the process of construction of the upper patterns of the Oxford shoe. Figure below. shows their sequential alignment on a half pair of shoes.

Patterns of the Upper components
11. Lining patterns making
Trace the upper standard pattern on the pattern paper and trace the lining standard pattern, as shown in Figure below.. The lining standard pattern will be used to construct the basic lining pattern pieces, namely: vamp lining, quarter lining, counter lining, and tongue lining.


Procedures for constructing lining standard pattern
Vamp lining: Lay the lining standard pattern on the folded pattern paper with the vamp line pattern aligned on the folded edge of the pattern paper, as shown in Figure below.

Vamp centreline aligned with the folded edge of pattern paper
Copy contour lines of vamp lining. Add 8 mm underlay allowance and cut the contour through both sides of the folded pattern paper or pattern paper. Unfold the pattern, cut the centre marker, and cut the inside marker, as shown in Figure below.. Then, label the pattern descriptions.

Unfolded vamp lining with markers
Tongue lining: Align the tongue line with centreline of the folded edge of the pattern paper. Copy the tongue contour, mark the vamp line, and add a 3 mm trimming allowance. Then, cut the current contour through both sides of the pattern paper.
Cut the vamp line marker, as shown in Figure 1.81, and unfold the pattern, as shown in Figure 1.82. Cut the centre marker and label the pattern with the pattern descriptions.

Tongue lining making

Tongue lining
Counter lining: Align the counter centreline on the folded edge of the pattern paper, copy the contour lines, and add 8 mm underlay allowance, and 3 mm trimming allowance. Cut the pattern through both sides of the pattern paper, unfold the pattern, as shown in Figure below., and label it with the pattern descriptions.

Counter lining
Quarter lining: Copy the construction lines of the quarter lining pattern. Add 3 mm trimming allowance, as shown in Figure below.

Quarter lining
This step completes the process of constructing for the lining patterns of the Oxford shoe. Figure 1.85 shows their sequential alignment on a half pair of shoes. After this procedure, the patterns are ready for cutting the leather material and continuing with the shoe assembly process.

Upper components patterns
Activity 1: Designing a vamp Oxford shoe pattern
Materials: pattern paper, and masking tape
Tools: cutting knife, pencil, eraser, shoe last, awl, cutting board and flexible measuring tape
Procedures
1. Prepare materials, tools, and the working table.
2. Cover the shoe last with masking tape.
3. Draw the three basic lines of construction.
4. Construct the mean form.
5. Construct the standard pattern.
6. Construct the basic vamp pattern and cut it.
7. Label the patterns.
8. Observe safety protocols.
9. Clean and store the tools.
Questions
1. Which design between plain vamp Oxford shoe patterns and wing cape Oxford patterns consumes more materials?
Exercise
1. How can a student generate income from footwear pattern-making? Discuss.
2. Discuss the methods of designing lace holes.
3. Explain the method of making a firm insole.
4. Explain the importance of a standard pattern in pattern-making.
5. Sketch an Oxford shoe and label its parts correctly.